
How to Install and Replace Printer Consumables for CompTIA A+ Core 1 (220-1101)
Why This A+ Objective Matters
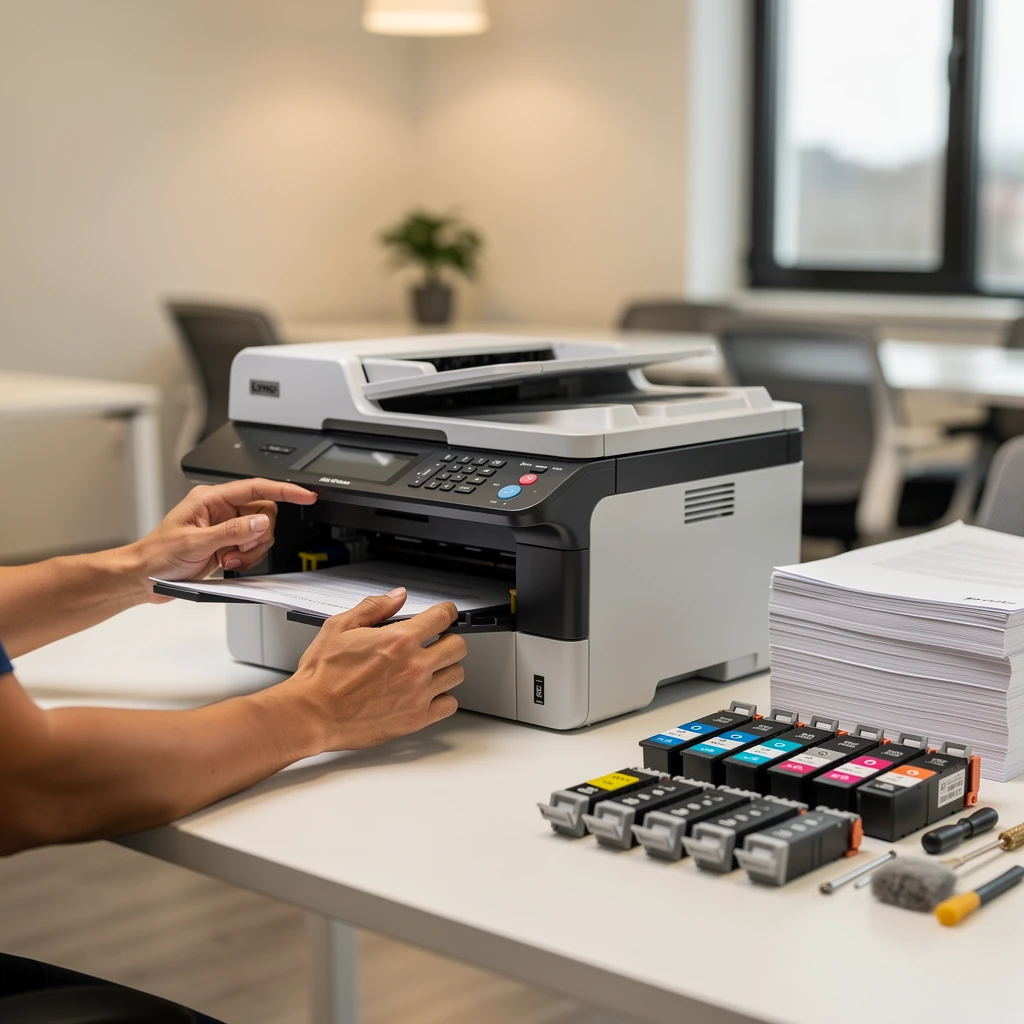
Printer questions on A+ Core 1 are mostly about spotting what you’re looking at and following the right steps. First, figure out what kind of printer you’re dealing with, then match the symptom or alert to the right consumable or maintenance part, replace it safely, and finish by making sure the printer actually prints the way it should. In the real world, when somebody says, “the printer’s broken,” that can mean a lot of different things — low toner, a worn-out ribbon, thermal paper loaded backward, clogged ink nozzles, or a maintenance kit that’s simply reached its page limit. The exam expects you to separate those possibilities instead of guessing.
What You Need to Know for This Objective
For A+ 220-1101, keep your focus on the big printer types you’ll actually run into: laser, inkjet, thermal, and impact. If 3D printing comes up somewhere else, think of it as extra context, not something this exam is really testing as a core consumables topic.
Here’s the terminology I’d definitely keep straight:
- Consumables: items regularly used up, such as toner, ink, thermal paper, and ribbon.
- Maintenance items / FRUs: longer-life field-replaceable units such as drum/imaging unit, fuser, transfer belt, pickup rollers, separation pads, and maintenance kits.
- Imaging unit / drum / photoconductor: vendor terms vary; on some models this is separate from toner, while on others it is built into the cartridge.
- Direct thermal: uses heat-sensitive media and no ribbon.
- Thermal transfer: uses ribbon plus compatible label stock.
That distinction matters on the exam. Toner is a consumable. A fuser is usually a maintenance item. If a question asks for the best replacement based on a “Replace Toner” alert, do not choose fuser just because both are inside a laser printer.
Printer Types and What You Replace
First identify the printer type. That one step eliminates a lot of wrong answers.
| Printer Type | Common Consumables | Common Maintenance Items / FRUs | What the Symptoms Usually Point To | Post-Replacement Action |
|---|---|---|---|---|
| Laser | Toner cartridge | Drum/imaging unit, fuser, transfer belt, maintenance kit, pickup rollers, separation pads | Faded print, streaks, ghosting, smudging, jams, replace alerts | Print configuration/test page, verify supplies status, reset counter if required |
| Inkjet | Ink cartridges | Print head, maintenance box/waste ink collector | Missing colors, banding, blank lines, misalignment, low-ink warnings | Run nozzle check, cleaning or alignment as needed, print test page |
| Thermal | Direct thermal paper or thermal transfer ribbon | Printhead, platen roller | Blank or faint receipts/labels, smeared output, feed issues | Print test label/receipt, confirm darkness and media calibration |
| Impact | Ribbon cartridge | Printhead, platen | Faint text, uneven output, poor multipart readability | Print sample form and check all copies |
Here’s a really important laser-printer detail: some models use one all-in-one cartridge that includes both toner and drum. Other models split those into two separate parts: a toner cartridge and an imaging drum. On enterprise color laser printers, you can also run into a transfer belt, and maintenance kits often bundle model-specific wear parts like pickup rollers, separation rollers or pads, and sometimes even a fuser. Always check the exact model before you order or install anything — seriously, it saves a lot of pain.
How I Check Status Before I Replace Anything
Before opening the printer, collect evidence from the device itself. A+ questions often hide the right answer in the status source.
- Control panel: Look for exact messages such as “Replace Toner,” “Replace Drum,” “Maintenance Kit Low,” “Install Ink,” or “Load Media.” Exact wording matters.
- Embedded web server: On network printers, check Supplies Status, page counts, event logs, and maintenance alerts. This is especially useful when the front panel is vague.
- Driver or vendor utility: Useful for ink levels, alignment prompts, cleaning functions, and cartridge recognition issues.
- Configuration or supplies page: Print a local page from the printer menu when possible. That usually tells me whether I’m looking at an actual printer hardware problem or something coming from the PC, driver, or application instead.
My workflow’s pretty straightforward: verify the model, identify the printer type, read the exact alert, print a local test page if I can, and then narrow it down to a consumable issue, a maintenance issue, a media problem, or maybe something software-related.
How I Figure Out What Actually Needs to Be Replaced
Do not replace parts based on a vague complaint alone. Use the symptom, the printer type, and the status message together.
| Symptom | Likely Item | Other Possible Cause | Best Next Step |
|---|---|---|---|
| Faded print | Toner, ink, ribbon | Draft mode, wrong media, clogged nozzles | Check supplies status and print a local test page |
| Unfused toner wipes off page | Fuser or wrong media | Incorrect paper weight/type, temperature issue | Verify paper settings and fuser/maintenance status |
| Repeated marks at fixed intervals | Drum, roller, or fuser-related defect | Contamination in paper path | Compare defect spacing; inspect drum/rollers/fuser by model guidance |
| Blank pages | Empty or sealed cartridge, wrong thermal media orientation, failed printhead | Incompatible cartridge, carriage fault, driver issue | Check seals/tape, media orientation, and print a local test page |
| Missing color or banding | Ink cartridge or clogged nozzles | Alignment issue, printhead fault | Run nozzle check before replacing more cartridges |
| Ghosting | Drum charge issue or fuser-related issue | Media/environment conditions | Check drum/imaging unit and media type |
| Blank thermal labels but media feeds | Wrong media/ribbon setup | Dirty printhead, darkness setting, backward roll | Confirm direct thermal vs thermal transfer and reload correctly |
With laser printers, repeating defects are one of the best clues you can get. If you see the same mark showing up at regular intervals down the page, that usually points to a damaged or dirty drum, roller, or fuser-related part. You don’t need to do circumference math for A+, but you do need to know that repeated spacing usually means a rotating part is involved, not just low toner acting up at random.
When Not to Replace a Consumable Yet
Some symptoms are solved by calibration, cleaning, settings, or correct media loading rather than immediate replacement.
- Inkjet misalignment: run alignment, not another cartridge swap.
- Missing ink lines: run a nozzle check, then cleaning if needed.
- Blank direct thermal output: check roll orientation first.
- Laser smearing: verify paper type and fuser condition, not just toner level.
- Frequent jams: think rollers, separation pads, or maintenance kit, not toner.
This is classic “best next step” exam logic. The right answer is often the least invasive action that fits the evidence.
Safety Rules Before Replacement
Follow vendor instructions for the specific model. Some printers should be powered off first; some inkjets require a powered-on workflow so the carriage can move into service position. Do not force moving parts by hand unless the manufacturer says to.
- Watch for hot fusers in laser printers.
- Avoid touching drum surfaces, ink nozzles, and electrical contacts.
- Use ESD precautions when you’re handling internal electronics or printheads if the manufacturer calls for it.
- Handle toner gently. If toner spills, use the approved cleanup method for your environment. Do not use a standard household vacuum, which can disperse toner and create static or fire risk unless it is toner-rated.
- Dispose of cartridges, waste ink, ribbons, and maintenance parts according to your company policy and whatever local rules apply.
Model and Part Number Verification
A very common field mistake is installing the wrong supply into a similar-looking printer. Before you replace anything, double-check the exact model number, cartridge family, and color slot if the printer uses separate color supplies. It’s also worth checking whether the printer takes standard-yield or high-yield cartridges, and whether regional part numbers or SKUs are part of the picture.
You might see OEM, remanufactured, and third-party options for the same model, but they’re not always equally compatible. In some environments, third-party supplies can affect cartridge recognition, yield reporting, firmware behavior, color consistency, and even whether support will back the device, depending on vendor policy and your organization’s rules. For exam purposes, the key idea is compatibility and correct part matching, not brand loyalty.
How to Replace Consumables by Printer Type
Laser printers
Consumable: toner. Common maintenance items: drum/imaging unit, fuser, transfer belt, rollers, maintenance kit.
- Read the exact alert and make sure you know whether that model uses an integrated toner/drum cartridge or separate parts.
- Open the correct access panel. If working near a fuser, allow cooling as required.
- Remove the old cartridge carefully. Do not touch the drum if exposed.
- Remove all packing material, seals, and protective strips from the new part.
- Install the replacement and fully latch covers.
- If replacing a maintenance kit, replace the specified components such as pickup rollers or separation pads exactly as directed for that model.
- Print a configuration or supplies status page and verify the alert clears automatically or through the proper menu if required.
If a printer still produces faded or defective output after toner replacement and the model uses a separate imaging unit, the drum may be the correct next replacement. If jams persist around feed pickup, think rollers or maintenance kit rather than toner.
Inkjet printers work a little differently, and the replacement steps usually revolve around cartridges, printheads, and calibration.
Consumable: ink cartridge. Common maintenance items: printhead, maintenance box.
- Use the printer menu or normal service workflow to move the carriage into replacement position if required.
- Remove the old cartridge carefully, and don’t touch the nozzles or contacts if you can help it.
- And don’t forget the protective tape on the new cartridge — that’s an easy one to miss.
- Make sure the cartridge seats firmly in the correct slot and clicks or locks into place the way it should.
- Run a nozzle check. If lines or colors are missing, run cleaning. If colors are shifted or text is not properly registered, run alignment.
- Print a test page and check that the color blocks look right, the text is sharp, and the alert has cleared.
Cleaning and alignment aren’t the same thing, and honestly, people mix those up all the time. Cleaning addresses clogged nozzles or missing lines. Alignment corrects placement and color registration. Excessive cleaning wastes ink and can fill the maintenance box faster, so use it only when the nozzle check supports it.
Thermal printers
Consumables: direct thermal media or thermal transfer ribbon.
- Determine whether the printer is direct thermal or thermal transfer.
- Load the correct media in the correct orientation. Direct thermal uses no ribbon.
- For thermal transfer printers, make sure the ribbon and label stock actually match the printer and are routed the right way.
- If print quality is bad, clean the printhead and take a look at the platen roller too.
- Run media calibration if the printer uses gap or black-mark sensing.
- Print a test label or receipt and verify darkness, feed, and positioning.
A quick field test for direct thermal stock: the surface darkens when scratched with a fingernail or exposed to heat. Direct thermal media fades over time, while thermal transfer is preferred for more durable labels. Blank output can also come from low darkness settings, dirty printheads, or ribbon/media mismatch.
Impact printers
Consumable: ribbon cartridge.
- Open the cover and note ribbon routing.
- Remove the old ribbon and install the new one with the proper tension.
- If that printer design calls for it, advance the ribbon and make sure it’s lined up correctly between the printhead and the platen.
- Print a sample form and verify legibility on multipart copies.
If output remains faint after ribbon replacement, consider platen wear or printhead pin failure.
Post-Replacement Verification
Once the part’s in, you’re still not done. You still need to verify that the printer’s actually ready to go.
- Laser: print configuration or supplies page, confirm toner level is recognized, check for no smear, no ghosting, and no persistent replace alert.
- Inkjet: check nozzle pattern, run alignment if needed, verify all colors print correctly.
- Thermal: verify darkness, label position, feed calibration, and readable barcodes if applicable.
- Impact: verify the top sheet and lower multipart copies are readable.
Some counters reset automatically when a new consumable is detected. Others require a menu confirmation or service-level reset. Don’t reset a maintenance counter unless you really replaced the maintenance item, or you’ll lose accurate service tracking.
What I Check if the Problem Still Isn’t Fixed
If the issue’s still there after replacement, I work through it in priority order:
- Printer still says replace or no cartridge: verify part number, seating, protective tape removal, contact cleanliness, and firmware compatibility.
- Blank laser pages after toner replacement: check for unopened seal, incompatible cartridge, shutter not opening, or imaging/HV contact issue.
- Inkjet still missing colors: review nozzle check results; repeated failed cleanings may indicate printhead or carriage fault.
- Thermal still blank: recheck direct thermal vs thermal transfer, media orientation, darkness setting, and printhead cleanliness.
- New jams after service: inspect guides, rollers, media path, and cover latches.
- Persistent repeating defects: inspect drum, rollers, or fuser-related components rather than replacing toner again.
If the problem clearly points to hardware repair instead of a simple consumable swap, it’s time to escalate — things like failed printheads, damaged fusers, broken latches, sensor faults, worn platens, or repeat errors after the right part was installed.
Security, Documentation, and What Matters in Managed Environments
In business environments, consumable replacement is also an operational process. Protect admin credentials for embedded web interfaces, restrict who can reset maintenance counters, and document what changed. Printed configuration pages may contain network details, so handle them appropriately.
Good ticket notes should include printer model, serial or asset tag, page count if relevant, part number installed, alert observed, tests performed, and user-visible result. Example: “Replaced black toner cartridge on network laser printer after ‘Replace Toner’ alert; verified correct part number, removed seal, printed configuration page, supplies status normal, no residual streaking.”
Performance and Preventive Maintenance
Good support is not just reactive. Shared printers often benefit from spare consumables on hand, scheduled maintenance by page count, and monitoring through fleet tools or managed print software. Maintenance kits reduce downtime because worn pickup rollers, separation pads, and fusers often cause jams and feed failures before total breakdown. Also avoid unnecessary ink cleaning cycles and wrong media settings, because both increase cost and wear.
A+ Exam Essentials and Scenario Drills
Memory aid: Laser = toner, drum, fuser. Inkjet = cartridge, printhead, cleaning/alignment. Thermal = paper or ribbon depending on type. Impact = ribbon.
Common exam traps: toner vs drum, cleaning vs alignment, direct thermal vs thermal transfer, consumable vs maintenance item, user-replaceable vs technician-replaceable.
- Scenario: Laser printer says “Replace Drum” after toner was changed yesterday. Best answer: replace the drum/imaging unit if that model uses separate units.
- Scenario: Inkjet prints skewed colors after new cartridges. Best answer: run alignment, not another cartridge replacement.
- Scenario: Receipt printer feeds paper but prints blank. Best answer: check thermal paper orientation first.
- Scenario: Laser output has toner that rubs off the page. Best answer: suspect fuser or incorrect paper/media settings.
- Scenario: Dot-matrix forms are faint on all copies. Best answer: replace the ribbon cartridge.
Certification-Style Questions
1. A laser printer displays “Replace Toner” and prints faint pages. What should you replace first?
Answer: Toner cartridge. The exact alert points to toner.
2. A laser printer still has repeated marks after toner replacement, and the model uses a separate imaging unit. What is the best next step?
Answer: Inspect or replace the drum/imaging unit. Repeating defects often indicate a rotating imaging component.
3. An inkjet prints missing cyan lines after cartridge replacement. What should you do first?
Answer: Run a nozzle check and cleaning if needed. Missing lines suggest clogged nozzles more than alignment.
4. An inkjet prints all colors, but the output is misregistered. What is the best next step?
Answer: Run alignment/calibration.
5. A receipt printer feeds paper but prints nothing. Which consumable issue is most likely?
Answer: Thermal paper loaded incorrectly or wrong media type.
6. Which item is usually a maintenance item rather than a routine consumable in a laser printer?
Answer: Fuser assembly.
7. A thermal transfer label printer is producing faint labels after ribbon replacement. What should you check next?
Answer: Ribbon/media compatibility, darkness setting, and printhead cleanliness.
8. A dot-matrix printer produces faint multipart forms. What should be replaced first?
Answer: Ribbon cartridge.
9. A printer does not recognize a newly installed cartridge. What should you verify first?
Answer: Correct model/part number and proper seating.
10. What is the safest cleanup guidance for spilled toner?
Answer: Use approved toner cleanup methods, not a standard household vacuum.
Final Review Checklist
- Confirm the exact printer model and type.
- Read the exact alert or symptom.
- Distinguish consumable from maintenance item.
- Verify the correct part number and compatibility.
- Follow vendor procedure for power state and access.
- Avoid touching drums, nozzles, and contacts.
- Remove all seals, tabs, and packing material.
- Install the part fully and latch all covers.
- Run the right verification step: test page, nozzle check, alignment, or media test.
- Reset counters only if the model requires it and the part was actually replaced.
- Document the work and dispose of materials properly.