CompTIA A+ Core 1 Troubleshooting: Motherboards, RAM, CPU, and Power — How I Teach Technicians to Classify the Symptom First
1. Introduction: why this A+ objective matters
When I’m teaching CompTIA A+ Core 1, I always give this objective a little extra attention because it lines up so well with the stuff you actually run into on the support floor. Motherboard, RAM, CPU, and power problems can all look weirdly similar at first, but once you pin down the actual symptom, the troubleshooting path changes pretty quickly. A machine that’s totally dead is a very different animal from one that powers on but never gets through POST. A system with no video doesn’t automatically mean the motherboard is bad. And a reboot loop is definitely not the same thing as a no-boot issue.
The rule I keep coming back to is pretty simple: figure out the symptom first, change one thing at a time, and then make sure the fix actually sticks. Honestly, that approach helps both on the exam and at the bench.
2. No power vs no POST vs no boot vs no display
This distinction is one of the most testable parts of the 220-1101 objective.
- No power: no lights, no fan movement, no signs of energizing. Start with source power, PSU, power connectors, and front-panel switch wiring.
- No POST: system powers on, but hardware initialization fails. Fans may spin, LEDs may light, but the system does not complete startup checks. Focus on RAM, CPU support, motherboard, firmware, and power delivery.
- No boot: POST completes, but the operating system does not load. That usually points more toward storage, boot configuration, or OS issues, though unstable RAM or power can contribute.
- No display: system may be powered and may even be running, but there is no video output. Start with the monitor, the cable, and the right video output first, then work your way toward the GPU, the RAM, and whether the CPU actually supports integrated graphics at all.
Exam trap: a missing 8-pin CPU power connector is mainly a no power/no POST issue, not a no-boot issue, because the system usually never reaches OS loading.
| Symptom | Likely area | First action | Common exam trap |
|---|---|---|---|
| No power | AC source, PSU, front-panel switch, motherboard power | Check outlet, cable, PSU switch, 24-pin ATX, CPU EPS | Replacing motherboard too early |
| No POST | RAM, CPU support, motherboard, firmware | Minimum boot and check POST indicators | Calling it “no boot” |
| No boot | Storage, boot order, OS | Confirm POST succeeded first | Blaming RAM before checking symptom stage |
| No display | Monitor path, GPU, RAM, iGPU support | Verify monitor/cable/output selection | Assuming motherboard video ports always work |
| Shutdown after a few minutes | Cooling, PSU, VRM | Check temperatures and fan/pump operation | Blaming CPU first |
3. Safe prep and minimum-boot setup
Before you crack open a system, shut it down, unplug the AC cable, and keep your ESD precautions in place. Pressing the power button after you unplug it can help drain a little leftover charge, sure, but it’s not a substitute for careful handling. If you’re working on a laptop, unplug the charger and, if the design supports it, disconnect or disable the internal battery before you start servicing.
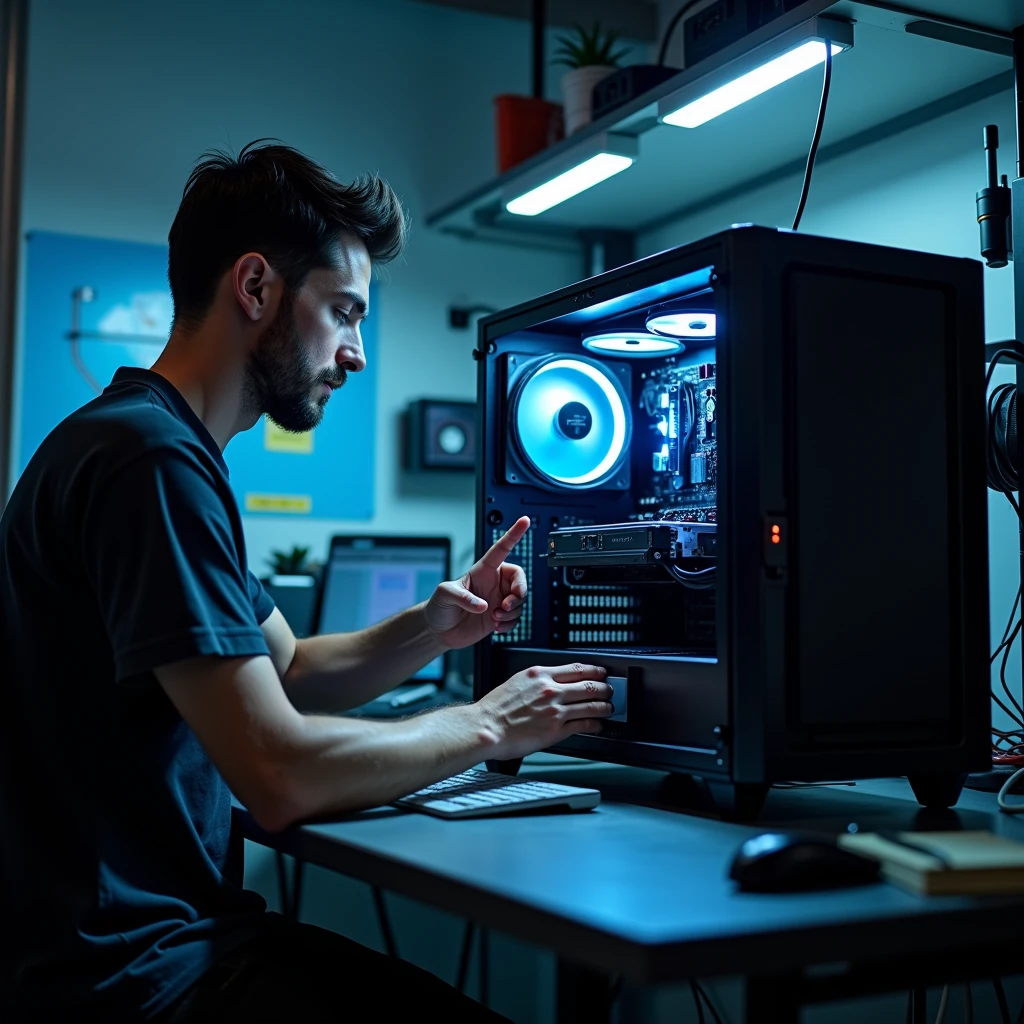
I always start with a visual inspection, because honestly, it catches way more than people expect. Look for scorch marks, liquid damage, corrosion, broken retention clips, damaged traces, loose cables, and heatsinks that are packed with dust. Bulging capacitors are still worth watching for, but on newer boards with solid capacitors, I don’t see them nearly as often as I used to.
Important safety rule: never open a PSU enclosure. A PSU can hold dangerous charge even after it’s unplugged, so it’s not something to mess with.
When the symptom is unclear, reduce the machine to a minimum boot configuration:
- motherboard
- CPU and cooler
- one RAM module
- PSU
- video output path: onboard video only if the board has display outputs and the installed CPU supports integrated graphics; otherwise use a required discrete GPU
Disconnect extra drives, USB devices, add-in cards, and additional DIMMs. If you bench test outside the case, use a nonconductive surface such as cardboard. Do not run the board on the outside of an anti-static bag, because the exterior can be conductive.
4. Motherboard troubleshooting
The motherboard and firmware coordinate startup and communication among the CPU, RAM, storage, and expansion devices. On modern platforms, many functions once associated with older chipset designs are integrated into the CPU or platform controller logic, so avoid oversimplified “the chipset does everything” thinking.
Common motherboard symptoms I’d watch for include no POST, onboard USB/audio/NIC failures, POST LEDs getting stuck at a certain stage, the same failure showing up even with known-good parts, and visible damage near the power delivery area. A weak CMOS battery usually shows up as a reset clock, lost firmware settings, boot-order changes, or POST warnings more than a full no-power failure.
My board troubleshooting sequence is:
- Make sure the 24-pin ATX and the 4- or 8-pin CPU EPS power connectors are pushed in all the way.
- Check front-panel header placement. For a standard momentary power switch, polarity usually does not matter, but the lead must be on the correct pins. LED polarity does matter.
- Inspect for physical damage or signs of a short.
- Clear CMOS if the issue started after a hardware or firmware change.
- Use minimum boot.
- If you think you’ve got a standoff issue or a chassis short, pull the board out and breadboard it outside the case.
- Swap in a known-good PSU, RAM stick, or CPU when needed so you can narrow the problem down.
When to suspect the motherboard: after you have ruled out source power, PSU, front-panel switch placement, RAM seating, CPU support, and obvious shorts, and the board still fails with known-good components.
5. Using POST indicators and board diagnostics
Modern boards often give you better clues than beginners realize. Common indicators include:
- Debug LEDs: labels such as CPU, DRAM, VGA, and BOOT show where startup stopped.
- Q-Code or POST code displays: alphanumeric codes that map to startup stages.
- Beep codes: still test-relevant, but many modern systems do not include an internal speaker by default, so no beep does not prove anything.
- OEM blink codes: some systems may use power LED blink patterns or proprietary diagnostics.
Always use the manual or service documentation for the exact meaning. A DRAM LED points you toward memory initialization, not necessarily a bad motherboard. A CPU LED can point to an unsupported processor, a missing EPS power connection, socket damage, or a problem in the board’s power delivery path.
If the system starts outside the case but not inside it, suspect an extra standoff, misplaced screw, or case contact causing a short. That is a classic breadboarding win.
6. Firmware and compatibility checks
BIOS/UEFI matters more than many new techs expect. CPU support depends on socket, platform/chipset, and BIOS/UEFI version, not socket alone. A new processor can fit the socket perfectly and still fail POST until the firmware gets updated.
After a CMOS reset, don’t be surprised if things like boot order, fan profiles, virtualization, SATA mode, TPM-related options, or Secure Boot get reset to their defaults. That can create new symptoms if you forget to restore required settings.
Safe firmware-update basics:
- Confirm exact motherboard model and revision.
- Read the CPU support information and required BIOS version.
- Use vendor instructions only.
- Do not interrupt power during the update.
- If supported, use BIOS Flashback or vendor recovery features for unsupported-CPU scenarios.
Exam tip: if a system stops POSTing immediately after a CPU upgrade, check firmware compatibility before declaring the CPU defective.
7. RAM troubleshooting and compatibility rules
RAM issues often show up as no POST, random freezes, app crashes, memory-related blue screens, or the system seeing less RAM than you actually installed. That said, keep your feet on the ground here — blue-screen errors can also come from drivers, storage corruption, overheating, or power instability. RAM is a very possible hardware cause, but it’s not the only one on the board.
Key rules:
- DDR generations are not interchangeable.
- DIMM is the common desktop form factor; SO-DIMM is common in laptops.
- Use the slot population order from the board manual.
- Wrong slot placement more commonly causes single-channel operation, reduced performance, failed memory training on some boards, or incomplete detection than vague “unpredictable behavior.”
- Mixed RAM kits can work, but they’re a pretty common source of instability.
- Compatibility also includes supported capacity per slot, rank density, and whether the system stays stable only at JEDEC default settings instead of XMP or EXPO profiles.
Memory training is worth knowing. After a RAM change or CMOS clear, some systems—especially DDR5 platforms—can take longer to boot or even restart a few times while they train the memory timings. Honestly, that can be totally normal on the first boot after a change.
For stability testing, disable XMP or EXPO and test at default JEDEC settings. If the system becomes stable, the issue may be memory profile settings rather than a dead DIMM.
| Symptom | Likely cause | Best first step |
|---|---|---|
| No POST after RAM change | Bad seating, wrong slot, incompatible module | Test one stick in the primary slot |
| Only part of RAM detected | Seating issue, bad slot, unsupported config | Check BIOS detection and slot order |
| Crashes under load | Faulty DIMM or unstable XMP/EXPO | Return to default memory settings and retest |
| Boots with one stick only | Bad DIMM, bad slot, memory controller issue | Swap sticks and slots to see what the fault follows |
Reseating RAM means checking notch alignment, pressing evenly, and confirming the latches fully close. Never force a mismatched module.
Useful tools include built-in memory diagnostics and dedicated memory-testing utilities. They are good validation tools, although a quick pass is not the same as long-term certainty.
8. CPU troubleshooting and cooling
Actual CPU failure is less common than installation, compatibility, or cooling problems. Start there first.
Socket inspection depends on platform:
- On AMD AM4-style PGA platforms, bent pins are on the CPU.
- On Intel LGA consumer platforms and AMD AM5-style LGA platforms, the delicate contacts are in the motherboard socket.
Also remember that motherboard video outputs only work if the installed CPU provides supported integrated graphics. Some CPUs in the same socket family include iGPU support and some do not.
CPU troubleshooting checklist:
- Verify CPU support information and BIOS version.
- Check EPS power connection.
- Inspect CPU or socket contacts carefully.
- Confirm cooler mounting pressure is even.
- Verify fan or pump operation.
- Check BIOS hardware monitor for temperature and RPM.
If you remove a cooler, clean off the old thermal paste and apply fresh paste the right way. Don’t just smear fresh thermal paste over old paste and assume that’s good enough. If using liquid cooling, verify that the pump is powered correctly; some systems expect a tach signal on CPU_FAN even if the pump or fan hub is powered elsewhere through AIO_PUMP, SATA power, or a controller.
Thermal problems usually show up as temperatures climbing fast in BIOS, fan warnings, throttling, shutdowns under load, or the system powering off not long after startup. An immediate shutdown can point to poor cooler contact, a failed fan, or a pump that isn’t running at all.
9. Power delivery diagnostics
The PSU converts AC input into DC voltage outputs used by the system, commonly +12V, +5V, and +3.3V. Many modern PSUs use a single +12V rail design, while others use multiple protected rails. For A+, the important point is stable power delivery, not rail theory.
Power troubleshooting starts upstream:
- wall outlet or known-good circuit
- power strip or UPS
- power cable
- PSU switch
- 24-pin ATX and CPU EPS connectors
- GPU supplemental power if installed
- front-panel power switch header
Wattage sufficiency matters most after upgrades, especially with discrete GPUs and higher-power CPUs. A system can power on just fine and still shut down or reboot under load if the PSU can’t keep up or is starting to fail.
PSU testers are handy for checking whether the basic voltages are there, but they don’t tell the whole story. A PSU can pass a tester and still fail under load, have ripple issues, or get flaky only when the system really starts drawing power. A known-good PSU swap is often more conclusive. A multimeter gives you a more direct reading if you know how to use it properly, but even then, it’s still not the same as a real load test.
Also, don’t mix modular PSU cables between brands — or even between different models from the same brand — unless the manufacturer specifically says they’re compatible. The connector might fit just fine and still be pinned completely differently.
10. Laptop-specific differences
A+ is not just desktop towers. Laptop troubleshooting changes the process:
- Start by checking the AC adapter’s output and wattage.
- Take a look at the DC-in jack for looseness, wear, or physical damage.
- If serviceable, disconnect the internal battery before internal work.
- Some laptops use SO-DIMMs, while others have RAM soldered right onto the board.
- On a lot of modern laptops, CPU replacement is either limited or just not practical.
- That’s why built-in diagnostics, blink codes, and service manuals matter even more on laptops.
A laptop that won’t power on could be dealing with an adapter issue, a battery issue, a bad DC jack, or a board-level fault. A laptop with no display might still be running, so listen for fan spin, drive activity, or a caps-lock response if that model gives you that kind of clue.
11. Practical troubleshooting workflows
Minimum-boot lab workflow:
- Disconnect nonessential devices and drives.
- Install one RAM module in the primary slot.
- Use onboard video only if the CPU supports it; otherwise keep the required GPU installed.
- Power on and check POST indicators.
- Reintroduce one removed component at a time.
- Document what change reintroduces the fault.
RAM isolation matrix:
| Test | DIMM | Slot | POST? | Detected correctly? |
|---|---|---|---|---|
| 1 | A | Slot 1 | Yes/No | Yes/No |
| 2 | A | Slot 2 | Yes/No | Yes/No |
| 3 | B | Slot 1 | Yes/No | Yes/No |
| 4 | B | Slot 2 | Yes/No | Yes/No |
If the failure follows the DIMM, suspect the module. If it follows the slot, suspect the slot, board, or memory controller path.
12. Scenario walkthroughs
Scenario 1: Fans spin, no display after CPU upgrade
The monitor’s plugged into the motherboard video output, which looks right at first glance. The new CPU fits the socket, but that model doesn’t actually include integrated graphics. The first best step is to confirm whether the CPU actually supports integrated graphics output, and if it doesn’t, install and use a discrete GPU instead.ad. Also confirm BIOS support for that CPU.
Scenario 2: PSU tester says good, but system shuts off during gaming
Basic rails are present, but the PC powers down only under heavy load after a GPU upgrade. First best step: verify GPU power connectors and test with a known-good, higher-capacity PSU. This teaches the limit of PSU testers and the difference between idle power and under-load stability.
Scenario 3: Board fails in case, works on cardboard
The system shows no POST in the chassis, but breadboards successfully outside the case. Most likely cause: a standoff mismatch or a loose screw causing a short. Check the chassis mounting points and reinstall the board the right way.
Scenario 4: Laptop dead with known-good adapter
No lights, no response. First best step: verify adapter output, inspect the DC jack, and perform the manufacturer-recommended battery reset or internal battery disconnect if serviceable. If still dead, escalate toward board-level diagnosis.
13. CompTIA troubleshooting methodology in practice
The exam expects structured troubleshooting. Use the official logic:
- Identify the problem.
- Establish a theory of probable cause.
- Test the theory to determine cause.
- If the theory is not confirmed, re-establish a new theory or escalate.
- Establish a plan of action to resolve the problem and implement the solution.
- Verify full system functionality and, if applicable, implement preventive measures.
- Document findings, actions, and outcomes.
Good ticket notes are simple and specific: “System powered but stopped at DRAM LED. Tested DIMM A in slot A2: no POST. Tested known-good DIMM in A2: POST successful. Replaced failed DIMM, verified full 16 GB detected, completed three cold boots.”
14. A+ exam tips and rapid review
- After upgrade usually means check compatibility, seating, firmware, and connectors first.
- Worked yesterday makes source power, loose connections, and recent changes important clues.
- Fans spin means it is not a pure no-power issue.
- Shuts down after a few minutes points strongly toward thermals or power instability.
- Debug LED on DRAM means start with memory, not the motherboard replacement shelf.
Most testable facts:
- DDR generations are not interchangeable.
- CPU support may require a BIOS update.
- Missing CPU EPS power can mimic a dead board.
- No display can be the wrong output path, especially with CPUs that lack integrated graphics.
- Overheating usually points to cooling, not an actually dead CPU.
- Some systems may use proprietary pinouts, front-panel layouts, and diagnostics.
15. Repair verification checklist
- System powers on consistently
- POST completes
- CPU and RAM are detected correctly in BIOS/UEFI
- Temperatures and fan or pump readings are normal
- Repeated cold boots succeed
- Removed devices are reconnected one at a time
- Original symptom is gone
- Findings, actions, and outcome are documented
16. Conclusion
For this A+ objective, the biggest skill is not memorizing part names. It is recognizing what stage of startup failed and choosing the right first step. No power, no POST, no boot, and no display are different problems. Once you classify the symptom correctly, minimum boot, connector checks, firmware verification, RAM isolation, cooling checks, and known-good swaps become much more effective.
That is the habit to build: classify the symptom, isolate the variable, verify the fix, and document what happened. That mindset passes exams and solves real hardware problems.